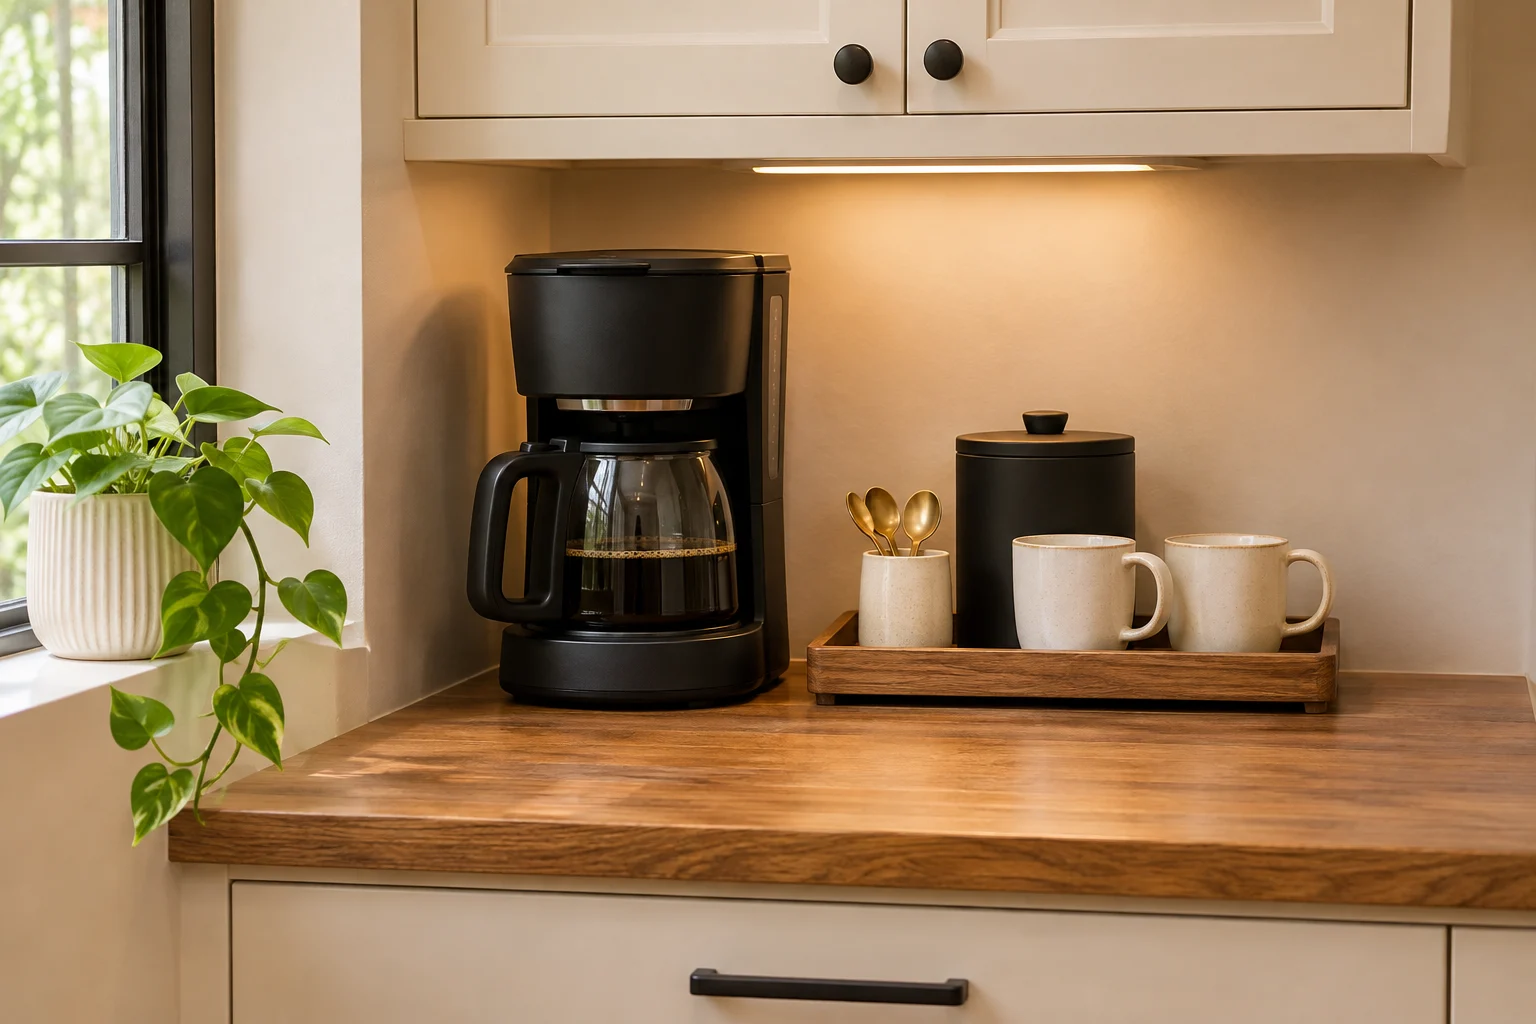
A small coffee station can hold everything you need and still look temporary. Bright packages compete for attention, cords cross the backsplash, mugs fill every open inch and decorative pieces make the machine harder to use.
The solution is not necessarily a new appliance or a custom cabinet. The most useful luxury coffee station ideas create order within the footprint you already have. A restrained palette, one visual boundary, better lighting and a little empty space can make a compact setup feel calmer and more intentional.
Start by removing items before shopping. Then use these nine ideas to rebuild the station around the way you actually make coffee.
Before styling, measure the working zone
Measure the counter or cart width and depth, but do not stop there. Open the coffee maker lid, remove the water tank, slide out the drip tray and move the carafe or portafilter through its normal path. If your machine has a steam wand, include the space needed to use and wipe it safely.
Follow the appliance manual for side, rear and overhead clearance. There is no single clearance number that works for every coffee maker. Leave a stable cup landing area and a direct refill path before assigning space to trays, canisters or decor.
If the current machine already feels too large, use the compact coffee maker guide to evaluate the footprint before adding accessories.
1. Limit the visible palette to two or three finishes
A compact station looks more polished when the visible materials repeat. Choose one base color, one warm material and one accent. For example, cream cabinets, medium wood and matte black can feel cohesive without requiring a matching appliance set.
Use the palette as an editing rule. A red coffee bag, blue pod box and patterned syrup label may each be attractive, but together they can make a small area feel busy. Move unrelated packaging into a drawer or cabinet rather than buying matching containers for everything.
Repetition matters more than perfection. Two black details placed apart can connect the setup visually. One wood tray can echo a cutting board or cabinet finish. You do not need every mug, spoon and canister to come from the same collection.
2. Use one tray to define the station
A tray creates a clear boundary around small items. It can hold a spoon cup, sugar bowl, scale or one daily mug so they read as a group instead of scattered objects.
Measure the items that truly need to sit together, then choose a low-lip, wipeable tray that fits that footprint. Leave space for your hand to lift each item without knocking into the machine. A substantial-looking tray can improve the composition, but it should not steal the cup landing zone.
The coffee maker does not need to sit on the tray. Keep it directly on the stable counter if a tray would cover its feet or vents, trap water or make cleaning harder. In many small setups, the best arrangement is machine on one side and a compact accessory tray on the other.
For more layout options, see these small coffee bar ideas for tiny kitchens.
3. Hide packaging and backstock
Luxury-looking spaces rarely show every refill at once. Keep the daily working supply near the machine and move extra pods, filters, coffee bags and cleaning supplies into one nearby drawer, cabinet or labeled bin.
This is not about hiding useful tools across the kitchen. The backup zone should still be easy to reach. The goal is to separate today's routine from the full inventory.
Begin with the largest or brightest package. Removing only that item may create more visual calm than adding another decorative object. If you need a complete daily-zone and backstock system, follow the small-space coffee station organization guide.
4. Coordinate only the containers that stay visible
Decanting every ingredient can create extra work and more containers to wash. Instead, coordinate the one or two items that remain in view every day.
A single coffee canister can provide a clean vertical shape beside the machine. Add a second container only if it solves a daily problem, such as holding sugar packets or stirrers. Keep labels subtle and preserve original packaging elsewhere when you need preparation, allergen or best-by information.
If you store whole beans, choose the container for function first. The 0.7-liter Fellow Atmos is one possible measured example: Fellow says it holds up to 11 ounces of coffee beans and recommends it for whole beans rather than ground coffee. Its vacuum lid and canister require hand washing. Compare that care routine and capacity with your habits before buying.
For a broader comparison of container types, light exposure and working-supply sizes, read the coffee bean storage guide.
5. Add warm task lighting in a safe location
Warm light can make a coffee corner feel finished while improving visibility during an early-morning routine. Under an upper cabinet, a slim rechargeable light may be easier to place than a corded lamp.
Choose lighting only after checking the machine's refill and steam paths. Keep the light and its mount away from heat, splashes and rising steam. It should not block the lid, water tank or cleaning access. A removable magnetic or adhesive mount is useful only when it is rated for the surface and remains secure.
Use a dim setting that illuminates the work surface rather than turning the light itself into the focal point. If there is no safe mounting location, skip this idea. Better ambient kitchen lighting is preferable to crowding the machine.
6. Make cords and appliance spacing look intentional
Cord control is both a visual and a practical decision. Position the coffee maker close enough to the correct wall receptacle that its cord does not cross the work area or hang over the counter edge. Manage only loose slack, without sharp bends, pinching or contact with a hot surface.
The U.S. Consumer Product Safety Commission advises keeping countertop appliances and cords away from sinks and hot surfaces. The National Fire Protection Association advises using only one heat-producing appliance, such as a coffee maker, per receptacle outlet at a time. Follow your appliance manual and local electrical requirements; do not assume a power strip or extension cord is suitable for the setup.
A tidy station is not worth hiding an electrical problem. Stop using an appliance or outlet that becomes unusually warm, smells burnt, sparks or repeatedly trips a breaker, and have the issue checked by a qualified professional or landlord.
7. Display fewer mugs with more space between them
Mugs become decor when their number, color and spacing look deliberate. Choose two to four that share a color family, finish or shape. Store the rest in a cabinet or rotate them seasonally.
Keep the daily mug easiest to reach and leave enough room to grasp the handle. A row of mugs pushed tightly against the machine looks crowded and can interfere with the cup path. One attractive mug with open space around it often has more impact than six competing designs.
If the collection is larger than the station, use the coffee mug storage ideas to divide daily mugs from occasional ones.
8. Use vertical space for light items only
A shallow shelf or rail can draw the eye upward and keep a few light items off the counter. It works best when it is installed after the machine's full opening height and steam path are measured.
Good shelf candidates include two light mugs, a small packet holder or one framed print. Avoid placing a heavy coffee maker on a floating shelf unless the shelf, fasteners and wall structure are specifically rated for that load. Do not create a shelf arrangement that requires reaching over hot liquid.
Renters can use an existing cabinet side or approved removable system instead of drilling, but the same weight and clearance checks still apply. See the renter-friendly coffee bar guide for more reversible options.
9. Leave one deliberate empty zone
Negative space is the least expensive way to make a small coffee station look more luxurious. Leave one strip of counter, backsplash or shelf visibly empty. That blank area separates the machine from the accessories and gives the eye a place to rest.
Do not rush to fill the opening with a sign, plant or another canister. Try the station for a week. If the routine works and the space still feels balanced, the empty area is doing its job.
A useful final rule is to remove one item before adding decor. The station should feel easier to clean and use after styling, not more fragile.
Three layouts for a polished small coffee station
An 18- to 24-inch counter nook
Place the machine on one side and protect a small cup landing zone in front. Use a compact tray for a spoon and one daily item, with a single canister at the back only if the lid and water tank still open fully. Skip a shelf when overhead clearance is tight.
A narrow coffee cart
Keep the machine on the stable top surface and use the lower shelf for protected backstock. Position the cart near the appropriate outlet so the cord does not cross a walkway or hang from the side. If you are still choosing furniture, compare the measurements in the narrow coffee cart guide.
A sideboard or cabinet zone
Use the top for the machine, a small tray and the cup landing area. Conceal extra supplies behind doors. Add task lighting only when the mounting point remains clear of steam, heat and water.
A short shopping checklist
Before buying anything for the station, check:
- Real footprint: Does the item fit without taking the cup landing or refill zone?
- Daily function: Does it solve a repeated problem, or is it only filling space?
- Cleaning path: Can you wipe the counter and remove the drip tray easily?
- Material and stability: Is it suitable for a kitchen surface and stable during use?
- Visual fit: Does it repeat the chosen palette instead of adding a new color or finish?
If an item fails one of the first four checks, leave it out even if it looks attractive in a product photo.
Frequently asked questions
How do I make a small coffee station look expensive?
Reduce the visible palette, hide backup packages, group small tools on one tray and leave part of the counter empty. Clean cord routing and clear appliance spacing usually make a bigger difference than adding more decor.
What colors make a coffee bar look more luxurious?
There is no required luxury palette. A simple combination such as warm white, wood and matte black works because the finishes repeat and the number of competing colors stays low. Use colors that connect with the surrounding kitchen.
Should a coffee maker sit on a tray?
Only when the tray is stable, large enough and does not block the appliance's feet, vents, drip tray or cleaning path. It is often better to keep the machine directly on the counter and use a smaller tray for accessories.
How much space should I leave around a coffee maker?
Use the clearance instructions in the exact appliance manual. Also test the lid, water tank, carafe, portafilter and steam-wand movement. Do not rely on a universal number from a general decorating guide.
What should stay visible on a small coffee station?
Keep the machine, one daily mug and only the supplies used in the regular routine. Add one tray or canister when it improves access. Store backups, cleaning products and occasional items nearby but out of sight.
Start by removing three items
Before ordering organizers, remove three visible items and make one full cup of coffee. Notice where your hand reaches, where the cup lands and what you actually miss.
Then add back only what supports that path. A limited palette, one contained group, safe lighting, tidy spacing and a deliberate empty zone can make a compact station feel polished without changing its footprint.